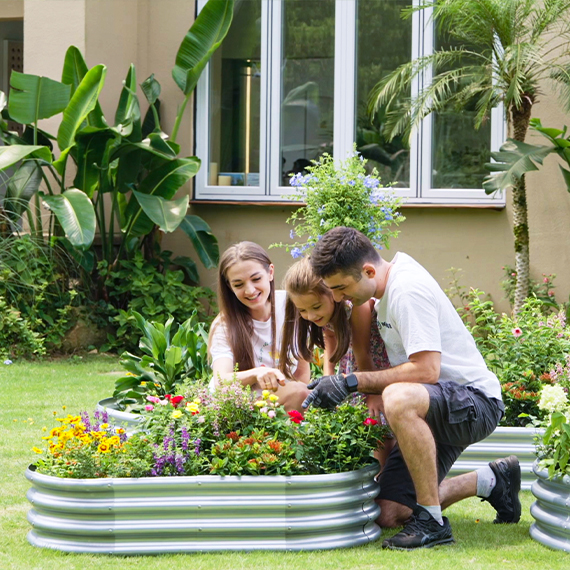
If you’re tired of flimsy wooden planters that rot quickly or plastic beds that warp in the sun, a galvanized steel ground-level garden bed is the perfect solution. Designed to sit directly on your lawn, patio, or soil, these beds resist rust, withstand extreme weather, and assemble in minutes—turning any outdoor space into a productive garden. Here’s your complete guide to using a ground-level galvanized bed for bountiful harvests year after year.
Why Ground-Level Galvanized Beds Stand Out
Before we dive into the “how,” let’s break down why these ground-hugging beds are a gardener’s favorite:
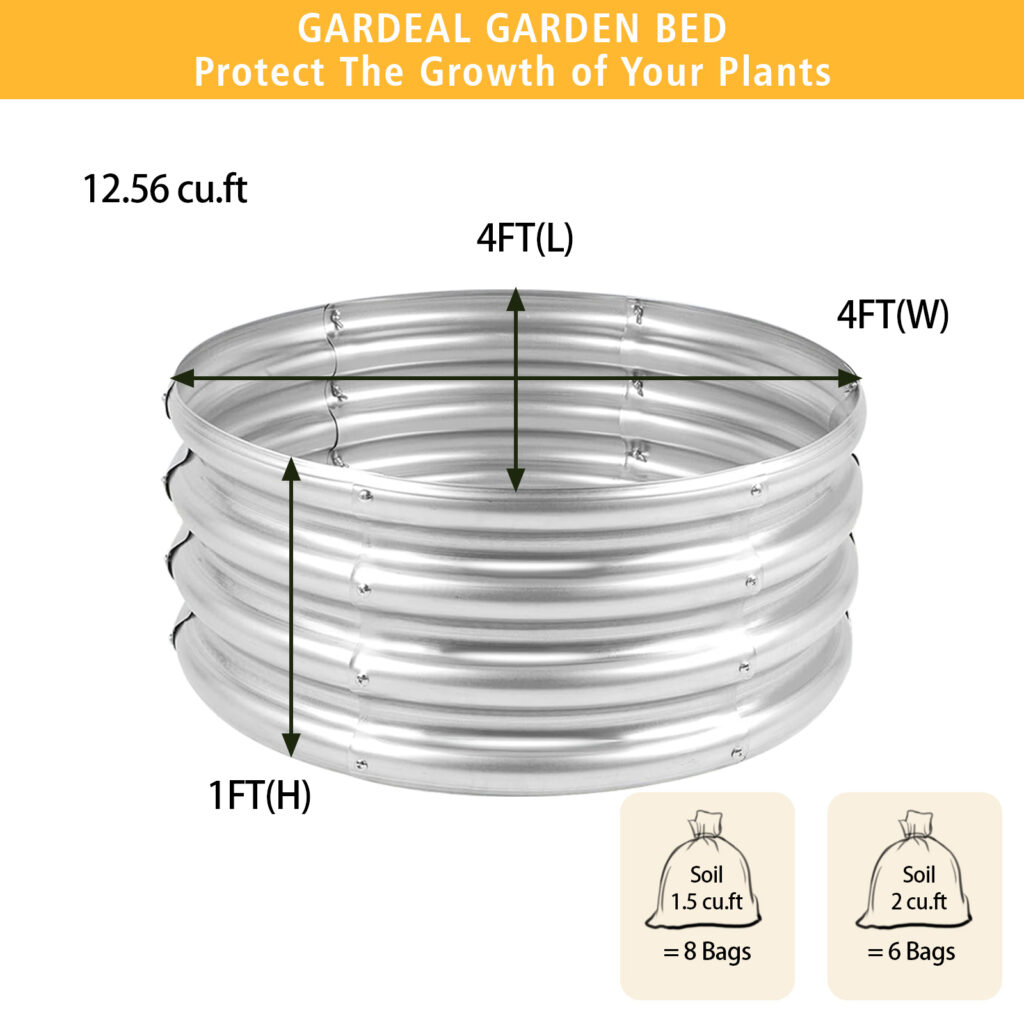
- Unbeatable Durability: Made with double-layer galvanized steel (like the 0.79mm thick sheets in premium models), these beds resist rust 3x longer than standard metal planters. They hold up to rain, snow, and sweltering heat for 10+ years—no rotting, warping, or splintering.
- Wavy Design Stability: The corrugated sides add structural rigidity, so your bed won’t deform under the weight of soil or plants. This extra stability means you can fill it with nutrient-rich soil without worrying about bulging, even when placed directly on uneven ground.
- 10-Minute Assembly: Pre-drilled holes, wing nuts, and illustrated instructions mean you can set up your bed in less time than it takes to brew a coffee—no tools required. Foldable models collapse flat for off-season storage, a huge win for small spaces.
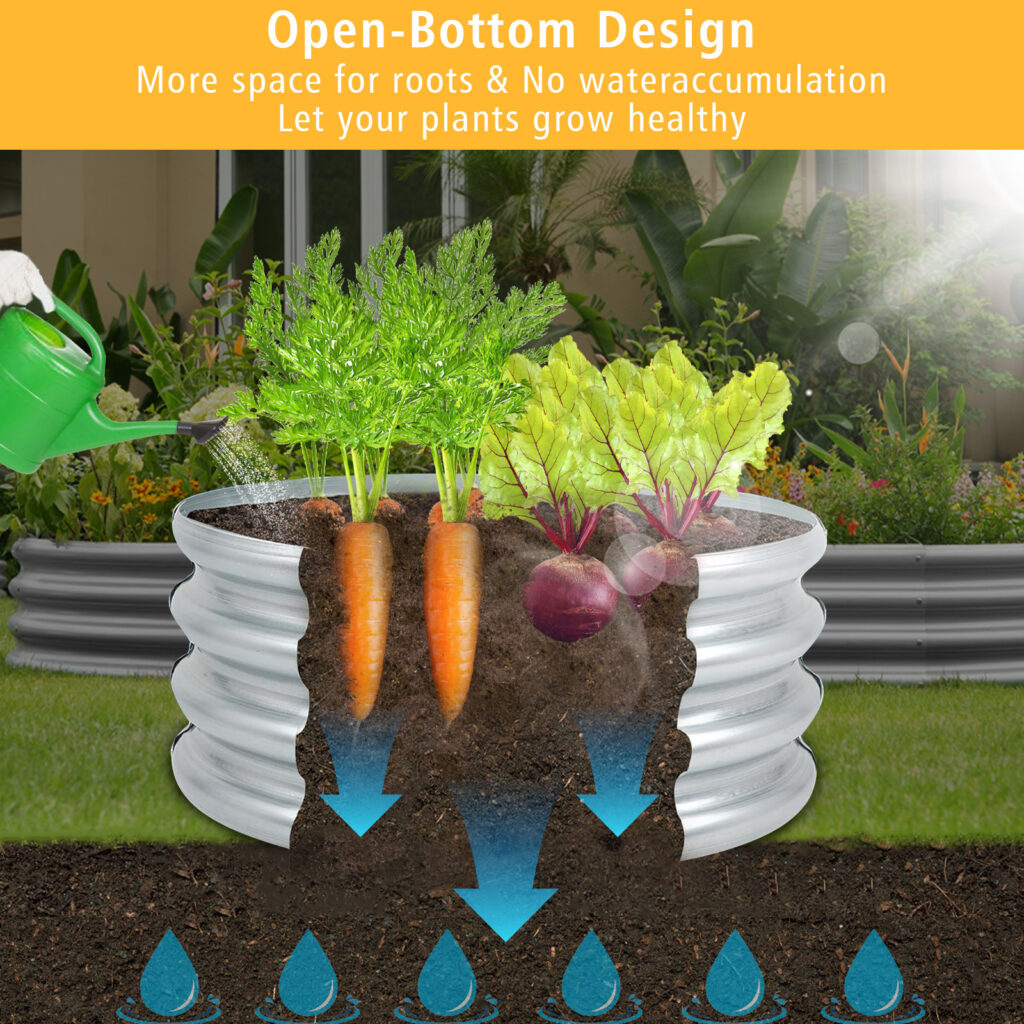
- Drainage & Root-Friendly: The open-bottom design lets water drain freely into the ground below, preventing root rot and promoting deep, healthy root growth. It also lets plants naturally spread their roots into the soil beneath, ideal for crops like strawberries or melons.
Step-by-Step Guide to Using Your Ground-Level Galvanized Bed
1. Pick the Perfect Spot
- Sunlight First: Choose a location that gets 6–8 hours of direct sunlight daily—most veggies, herbs, and flowers need this to thrive.
- Flat, Well-Drained Ground: Since the bed sits directly on the ground, pick a level spot to avoid tilting. If your yard is prone to pooling water, lay a 1–2 inch layer of gravel beneath the bed to boost drainage.
- Easy Access: Ensure you can reach all sides of the bed without stepping on the soil (compaction kills roots!). Aim for a width of 3–4ft so you can tend plants from either side.
2. Assemble in Minutes
- Lay out all parts (corrugated panels, corner brackets, wing nuts) on a flat surface.
- Align the panels with the corner brackets, then tighten the wing nuts by hand—no drills or wrenches needed.
- For foldable models: Once assembled, the bed stays rigid during use, but collapses flat for off-season storage (perfect for balconies or small patios).
3. Prep the Ground & Soil
- Block Weeds (Optional): Line the bottom with landscape fabric to stop weeds from growing up through the open base. Skip this if you want plants to root into the native soil below, or if weeds aren’t a problem in your yard.
- Mix the Ideal Soil Blend: Ground-level beds drain well, but still benefit from a light, nutrient-rich mix:
- 40% high-quality topsoil (organic if possible)
- 40% compost (homemade or store-bought)
- 20% perlite or vermiculite (for aeration)
- Fill the bed to 1–2 inches below the rim to prevent soil spillage when watering.
4. Plant Like a Pro
- Square Foot Gardening Hack: Divide the bed into 1ft squares (use string or paint markers) and plant a set number of seeds/seedlings per square (e.g., 1 tomato per square, 9 lettuce plants per square). This maximizes space and makes harvesting easier.
- Group by Needs: Cluster thirsty plants (tomatoes, cucumbers) together, and drought-tolerant herbs (rosemary, thyme) in a separate section. Leave 1–2 inches between plants for air flow to reduce disease risk.
- Ideal for Sprawling Plants: The ground-level design is perfect for crops that spread, like strawberries, pumpkins, or squash—their vines can trail over the edges into your yard.
5. Maintain for Long-Lasting Growth
- Water Deeply: Beds dry out faster than in-ground soil, so water 2–3 times weekly (1–2 inches per session) instead of light daily sprays. Water at the base of plants to avoid fungal issues.
- Weed Sparingly: The landscape fabric (if used) and ground-level design mean weeds will be minimal. Pull small weeds as soon as you see them—they’re easier to remove before roots take hold.
- Feed Regularly: Add a 1–2 inch layer of compost every 4–6 weeks. For heavy feeders (peppers, squash), use an organic liquid fertilizer once a month.
6. Store for the Off-Season
- Empty the soil (or cover it with a tarp to protect it from rain/snow).
- Fold the bed flat (for foldable models) and store it in a garage, shed, or covered area. The galvanized steel resists corrosion, so it’ll be ready to go next spring.
Pro Tips for Maximizing Your Ground-Level Bed
- Pest Protection: Line the bottom with hardware cloth to stop rodents from digging up plants (perfect for root crops like carrots or beets).
- Crop Rotation: At the end of the season, swap plant families (e.g., grow leafy greens where tomatoes grew last year) to keep soil healthy and prevent pests.
- Add a Border: For a polished look, surround the bed with gravel or mulch to define the space and prevent soil erosion.
Ground-level galvanized garden beds aren’t just a gardening tool—they’re a long-term investment in easier, more productive growing. With their rust-proof strength, quick assembly, and ground-friendly design, you’ll spend less time fixing your planter and more time harvesting fresh veggies, fragrant herbs, and vibrant flowers.
Ready to turn your gardening dreams into reality? Grab your galvanized bed, roll up your sleeves, and let the growing season begin!